Build an iOS order-ahead experience using Radar, Segment and Twilio
You'll build an order-ahead iOS app that simulates a user in the real world ordering food and traveling to a restaurant to pick up their order. The app will track the user's various trip states and send a final SMS to notify the user that the order is ready.
The app will use Radar to power the trip-tracking experience, send Radar events to Segment, and finally pipe the events to Twilio for SMS notifications.

The recent COVID-19 pandemic changed consumer behaviors in many ways, one of them being a trend towards buy-online pickup in-store (BOPIS). The expectation of most consumers from modern retailers is a mobile app or website where they can make an order ahead of time and receive a fresh order as soon as they arrive.
Radar provides the building blocks to power order-ahead experiences with enterprise-level geofence management, battery-efficient location SDKs, operational dashboards, and analytics.
Segment can accept events from Radar to power a 360-degree view of users who interact with your physical locations. This can power a number of hyper-personalized experiences, like loyalty programs, order recommendations, and smarter messaging.
In this recipe, we'll show you how you can build an order-ahead experience on iOS using Radar, Segment, and Twilio. Radar also provides easy-to-use Android, React Native, and Flutter SDKs that make it easy to build BOPIS experiences across different platforms with a unified interface.
Step 1: Get your API keys
Segment
Navigate to the Segment signup page here. Once you've completed the process, then we can set up a Segment source. This can be found under the Sources section.
We'll create a Node.js source, which will represent the Radar-Segment integration. You can then obtain the Segment write key for this source.
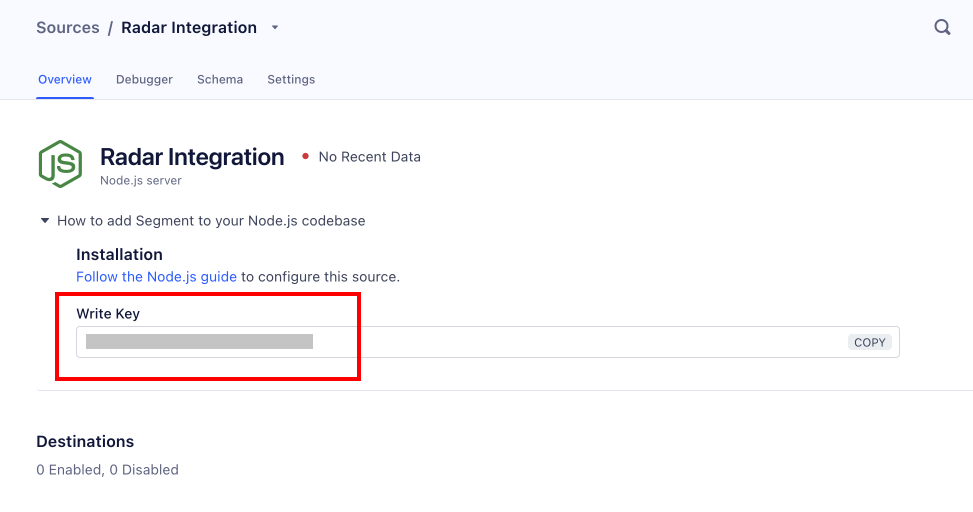
You'll use this key for the Radar-Segment integration in the next section.
Radar
Head on over to the Radar signup page to sign up and obtain a publishable key. This can be found in the Getting Started section of the dashboard.

We'll use the Test Publishable key for the iOS application.
Next, we'll set up the Radar-Segment integration which can be found on the Integrations page. Fill in the Segment write key that we obtained in the Segment section above.

We recommend setting up another Segment workspace with another write key for the Radar live environment.
Twilio
Navigate to the Twilio signup page and set up a trial account. You can then create a Twilio-generated phone number and get API credentials.

Step 2: Create a Radar geofence
In the Radar dashboard, head over to the Geofences section to create a new geofence. This geofence will represent a store that you own.

We'll create a geofence in Brooklyn (20 Jay Street), but this can be anywhere in the world.

We'll then fill in some details of this geofence.

It's worth noting that you can import geofences via CSV or by syncing an S3 bucket instead of using the manual interface. Customers manage millions of geofences using Radar.
Step 3: Set up Radar and Segment on iOS
To install the Radar SDK, we'll use Cocoapods. In your Podfile, add the following entries:
pod 'RadarSDK', '~> 3.1.0'
Run pod install and then you should be able to import Radar.
We'll then initialize Radar in our app entry point and create our test user, Mr. Jon Hammburglar.
let userId = "hammburglar"

// initialize the Radar SDK and user
Radar.initialize(publishableKey: "PUBLISHABLE_KEY")
Radar.setUserId(userId)
We'll then request location permissions to make sure we can turn on trip-tracking. Make sure you've set up the appropriate location permission prompt copies in Info.plist like so:

To request location usage on iOS, we'll use the following code:
let status = self.locationManager.authorizationStatus
if status == .notDetermined {
    self.locationManager.requestWhenInUseAuthorization()
}
Now we're ready to build a location-powered app experience that can unify curbside pickup data across all channels using Segment and Radar!
Step 4: Track a trip to the store
Let's create a trip. This can be done when a user has placed an order online and begins heading over to the store.
// user places an order and receives an order id from the order management system
let externalId = "my-first-burger-pickup"
// start trip
let tripOptions = RadarTripOptions(externalId: externalId)
tripOptions.destinationGeofenceTag = "curbside-stores"
tripOptions.destinationGeofenceExternalId = "my-store-1"
tripOptions.mode = .car
tripOptions.metadata = [
    "Customer Name": "Jon Hammburglar",
    "Car Model": "Hamburglar Mobile",
    "Phone": "5551234567"
]
Radar.startTrip(options: tripOptions)
Now that we've started the trip, Radar is able to easily track the location of a user's device for the duration of that trip. The Radar trip events user.approaching_trip_destination and user.arrived_at_trip_destination (documented here) can be used to personalize and streamline a user's order-ahead experience.
For this demo, we'll simulate a user driving to the store with Radar.mockTracking() For a production use case, the Radar iOS SDK also comes with tunable background tracking APIs, so you won't need to do any of the heavy-lifting associated with location.
We'll define a method to simulate a trip by car.
func simulateTrip() {
  if self.tripState == .loading {
      return
  }

  self.tripState = .loading
  setupTrip { status in
      let numberOfSteps: Int32 = 8
      var currentStep: Int32 = 0
      if status == RadarStatus.success {
          Radar.mockTracking(
              origin: CLLocation(
                    latitude: CLLocationDegrees(40.69770571883561),
                    longitude: CLLocationDegrees(-73.96773934364319)),
              destination: CLLocation(
                    latitude: CLLocationDegrees(40.70441607862966),
                    longitude: CLLocationDegrees(-73.98654699325562)),
              mode: RadarRouteMode.car,
              steps: numberOfSteps,
              interval: TimeInterval(1)) { status, location, events, user in
                  // handle error case
                  if status != RadarStatus.success {
                      self.tripState = .error
                      return
                  }

                  // update trip step
                  self.events = events

                  // check if trip is done
                  currentStep += 1
                  if currentStep == numberOfSteps {
                      self.tripState = .arrived
                      Radar.completeTrip()
                  }
            }
      } else {
          self.tripState = .error
      }
  }
}
In a production use-case, we'd use Radar.startTracking() instead of Radar.mockTracking() to capture background updates.
Let's send up some Segment-tracked location updates by toggling simulateTrip with a UI. The UI to control this is out of the scope of this recipe, but all the code for this app can be found here. If you decide to set up the project locally, you'll have a UI like so:

After simulating a trip with simulateTrip, you can verify that the trip has been created successfully in the Radar trips dashboard.

Jon Hammburglar has arrived at his destination and is hopefully munching on some fresh made-to-order, artisanal burgers!
Next, let's verify that events have made their way to Segment.
Step 5: View the events in Segment
While Radar provides the location smarts, Segment gives us a way to unify the data across all our platforms.
Go to your workspace at https://app.segment.com, navigate to the Source we created earlier, and click on the Debugger.

Fantastic, our trip updates are in Segment! We'll be able to leverage this location data from Radar to power a number of use cases, such as:
- Customer engagement: Provide customers with timely notifications about their order, and instructions for when they arrive. We'll prototype this in the recipe.
- Store operations: Notify store associates to prepare an order for customers who are en route, and send an arrival notification to staff as customers are pulling into the parking lot.
- Loyalty programs: Remind users to scan loyalty cards or redeem loyalty benefits when they’re arriving at your restaurant location.
- User segmentation: Send a special coupon to guests who had a wait time more than 2 minutes above that location's average.
- Data analytics and warehousing: Set a benchmark for average customer wait times and correlate wait times against loyalty and frequency behavior.
Step 6: Send SMS notifications with Twilio and Segment
Let's build a great order-ahead experience for Jon Hammburgler and notify him that his burger is ready to pick up when he arrives at the store.
To do this, we'll leverage Twilio's SMS capabilities, powered by the events we've sent to Segment. Segment has a Functions feature that lets us run serverless functions on Segment events. Let's go ahead and create one of these functions.
Navigate to Catalog, then the Functions tab and click the New Function button. We'll then write a lambda function to send Twilio texts.
async function onTrack(event, settings) {
  const validEvent = event.event === 'Trip Arrived Destination';
  const Body = 'Your 🍔 is ready!';
  const To = event.properties && event.properties.trip_metadata_Phone;
  const From = 'TWILIO_PHONE_NUMBER';

  if (validEvent && From && To) {
    await sendText({
      From,
      To,
      Body
    }, settings);
  }
}

async function sendText(params, settings) {
  const accountId = 'TWILIO_ACCOUNT_ID';
  const token = 'TWILIO_AUTH_TOKEN';
  const endpoint = `https://api.twilio.com/2010-04-01/Accounts/${accountId}/Messages.json`;
  await fetch(endpoint, {
    method: 'POST',
    headers: {
      Authorization: `Basic ${btoa(accountId + ':' + token)}`,
      'Content-Type': 'application/x-www-form-urlencoded;charset=UTF-8'
    },
    body: toFormParams(params)
  });
}

function toFormParams(params) {
  return Object.entries(params)
    .map(([key, value]) => {
      const paramName = encodeURIComponent(key);
      const param = encodeURIComponent(value);
      return `${paramName}=${param}`;
    }).join('&');
}
Let's save this function and then attach it to our Source. This can be done by navigating to the Functions tab, Connect Destination, and selecting our Node.js Source.
Let's re-run through our app trip toggle states like we did above and if everything has been configured correctly, Jon Hammburglar will receive an SMS of his fresh burger when he arrives at the store.
Great success!
Wrapping up
Here's what we've done in this growth recipe:
- Built a tracked order-ahead experience using Radar geofences and trips
- Leveraged Segment as an event bus for Radar trip events, capable of powering many helpful use cases beyond the scope of this recipe
- Built an SMS-based arrival notification using Segment functions and Twilio
With this, you can easily build out a scalable curbside pickup program and power your digital-physical customer data personas with Segment. The full source code is open-source and can be found here.