Building menuboard detection with in-geofence tracking options
In this tutorial, we show you how to use in-geofence tracking options to build reliable, high-accuracy drive-thru menuboard detection while remaining battery efficient.
Steps#
Step 1: Sign up for Radar#
If you haven't already, sign up for Radar to get your API key. You can create up to 1,000 geofences and make up to 100,000 API requests per month for free.
Get API keysStep 2: Create geofences#
There are several ways to create geofences:
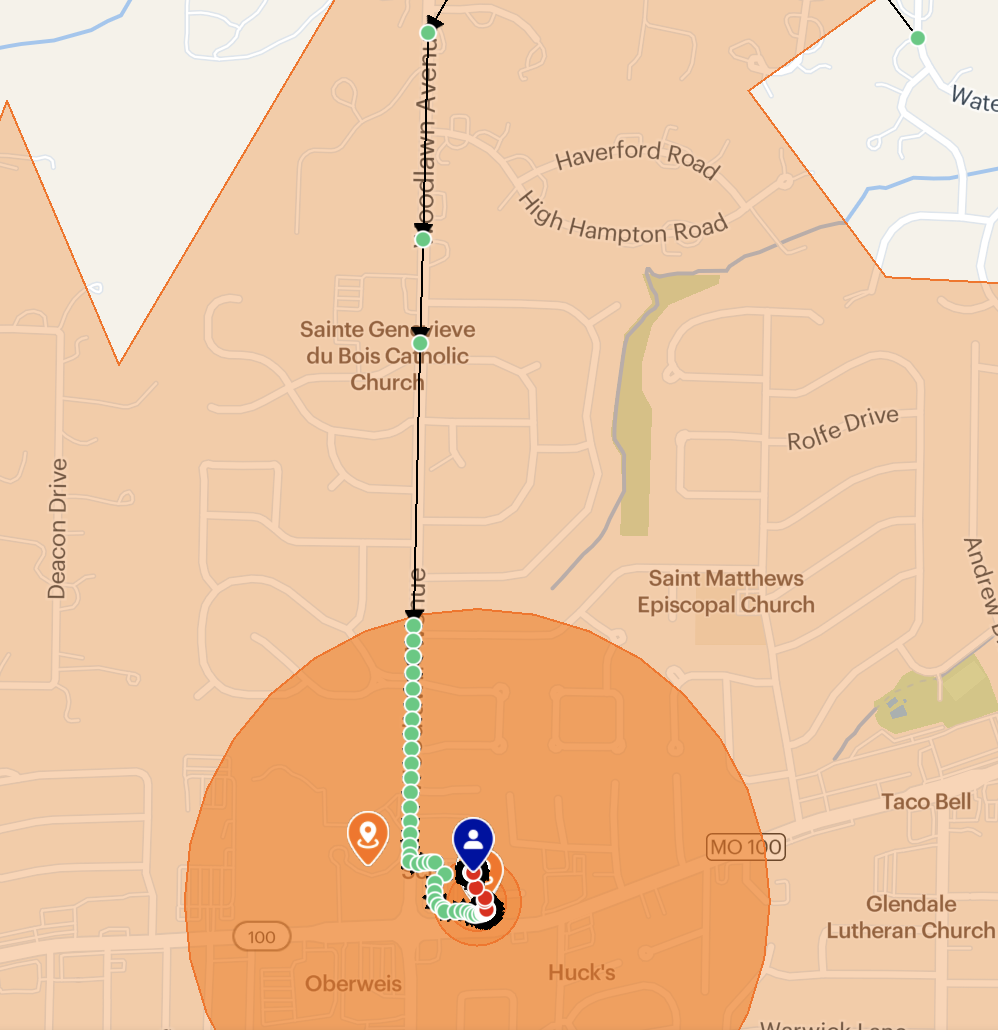
The tag is a group for the geofence. In this tutorial, we'll create two geofences for each drive-thru, a large circular geofence with radius 500m with tag ramp-up and a small, car-length polygon geofence in front of the menu board.
Step 3: Initialize the SDK#
Initialize the SDK with your publishable API key.
- Swift
- Kotlin
- React Native
import UIKitimport RadarSDK
@UIApplicationMainclass AppDelegate: UIResponder, UIApplicationDelegate {  func application(_ application: UIApplication, didFinishLaunchingWithOptions launchOptions: [UIApplication.LaunchOptionsKey: Any]?) -> Bool {    Radar.initialize(publishableKey: "prj_test_pk_...")    Radar.setUserId("foo")
    return true  }
}import io.radar.sdk.Radar
class MyApplication : Application() {
override fun onCreate() { super.onCreate()
Radar.initialize(this, "prj_test_pk...") Radar.setUserId("foo") }
}import React, { useState, useEffect } from "react";import Radar from "react-native-radar";
export default function App() { Radar.initialize("prj_live_pk_..."); useEffect(() => { Radar.setUserId(userId) }, [userId]);
return ( <div id="content"> </div> );}Step 4: Request foreground permissions#
- Swift
- Kotlin
- React Native
import UIKitimport RadarSDKimport CoreLocation
@UIApplicationMainclass AppDelegate: UIResponder, UIApplicationDelegate, CLLocationManagerDelegate {
  let locationManager = CLLocationManager()
  func application(_ application: UIApplication, didFinishLaunchingWithOptions launchOptions: [UIApplication.LaunchOptionsKey: Any]?) -> Bool {    Radar.initialize(publishableKey: "prj_test_pk_...")    Radar.setUserId("foo")
    self.locationManager.delegate = self    self.requestLocationPermissions()
    return true  }
  func requestLocationPermissions() {    let status = self.locationManager.authorizationStatus
    if status == .notDetermined {      self.locationManager.requestWhenInUseAuthorization()    }  }
}import android.Manifestimport android.app.AlertDialogimport android.content.pm.PackageManagerimport android.os.Build
import androidx.core.app.ActivityCompat
import io.radar.sdk.Radar
class MainActivity : AppCompatActivity() { private val foregroundLocationPermissionsRequestCode = 1
override fun onCreate(savedInstanceState: Bundle?) { super.onCreate(savedInstanceState)
Radar.initialize(this, "prj_test_pk_...") Radar.setUserId("foo")
requestLocationPermissions() }
private fun requestLocationPermissions() { if (ActivityCompat.checkSelfPermission(this, Manifest.permission.ACCESS_FINE_LOCATION) != PackageManager.PERMISSION_GRANTED) { ActivityCompat.requestPermissions(this, arrayOf(Manifest.permission.ACCESS_COARSE_LOCATION, Manifest.permission.ACCESS_FINE_LOCATION), foregroundLocationPermissionsRequestCode) } }
}Because we'll be using the continuous preset and a foreground service, make sure you include the FOREGROUND_SERVICE_LOCATION permission in your manifest.
import React, { useState, useEffect } from "react";import Radar from "react-native-radar";
export default function App() {  Radar.initialize("prj_live_pk_...");
  useEffect(() => {    Radar.setUserId("foo")  }, [userId]);
  let permissionStatus = await Radar.getPermissionStatus().then((permissionStatus))
return ( <div id="content"> </div> );}Learn about platform-specific permissions in the iOS SDK documentation and Android SDK documentation.
Step 5. Configure remote tracking options#
In the Radar dashboard, navigate to the SDK configuration section in settings. Toggle on "Remotely set tracking options". Then toggle on "Enable on-trip tracking options" and set the "Tracking preset" to "Continuous". Toggle on "Enable in-geofence tracking options", set the "Tracking preset" to "Custom" and replace the JSON blob below with the following tracking options on iOS and Android respectively:
- iOS
- Android
{ "desiredStoppedUpdateInterval": 3, "desiredMovingUpdateInterval": 3, "desiredSyncInterval": 2, "desiredAccuracy": "high", "stopDuration": 140, "stopDistance": 70, "sync": "all", "replay": "stops", "showBlueBar": true, "useStoppedGeofence": true, "stoppedGeofenceRadius": 100, "useMovingGeofence": true, "movingGeofenceRadius": 50, "syncGeofences": true, "useVisits": true, "useSignificantLocationChanges": true, "beacons": false}{ "desiredStoppedUpdateInterval": 3, "fastestStoppedUpdateInterval": 3, "desiredMovingUpdateInterval": 3, "fastestMovingUpdateInterval": 3, "desiredSyncInterval": 2, "desiredAccuracy": 2, "stopDuration": 140, "stopDistance": 70, "replay": 1, "sync": 2, "useStoppedGeofence": true, "stoppedGeofenceRadius": 100, "useMovingGeofence": true, "movingGeofenceRadius": 100, "syncGeofences": true, "syncGeofencesLimit": 10, "beacons": false, "foregroundServiceEnabled": true}In the field entitled "Geofence tags", input the tag of the geofence you created to trigger the increase in tracking frequency, ramp-up.
Step 6. Start tracking and start a trip#
When the user places an order and taps "I'm on my way," start tracking to start live location tracking, start a trip to the destination geofence. Use the order ID, in this case 456, for the trip externalId.
- Swift
- Kotlin
- React Native
let tripOptions = RadarTripOptions(externalId: "456")tripOptions.destinationGeofenceTag = "restaurant"tripOptions.destinationGeofenceExternalId = "123"tripOptions.mode = .carRadar.startTrip(options: tripOptions)let tripOptions = RadarTripOptions("456")tripOptions.destinationGeofenceTag = "restaurant"tripOptions.destinationGeofenceExternalId = "123" tripOptions.mode = RadarRouteMode.CARRadar.startTrip(tripOptions)const tripOptions = { externalId: "456", destinationGeofenceTag: "restaurant", destinationGeofenceExternalId: "123", mode: "car"};Radar.startTrip(tripOptions);When a user is being tracked and enters the ramp-up geofence, the SDK will increase the frequency of location updates. With the frequency and accuracy of the ramped-up tracking, you can accurately detect when a users enters a car-length geofence in front of a menuboard.
