Maps
Radar Maps is a cost-effective alternative to Google Maps Platform and Mapbox.
For example, here's a Radar Map displaying a marker for Radar HQ:
You can also check out the maps explorer in the dashboard, or check out a full-page maps demo and store locator demo.
How it works#
To use Radar Maps, simply initialize the Radar SDK with your publishable key and specify the container to render the map into.
Radar Maps is an extension of the MapLibre GL JS library. See their docs for more customization info.
Configuration#
You can configure a map with any MapLibre MapOptions.
The minimum recommended options are the following:
| Name | Default | Possible values | Description |
|---|---|---|---|
container | none (required) | string | HTMLElement | The container to render the map into. You can specify an id of an HTML element or a DOM element. The width and height of this element will determine the size of the map. |
style | radar-default-v1 | radar-default-v1, radar-light-v1, radar-dark-v1 | The style of the map. See below for more details. |
center | none (IP geolocation) | [longitude, latitude] | The center of the map. If not specified, the map will automatically be centered based on the client's IP geolocation. |
zoom | 11 | number | The zoom level of the map, a number between 0 (fully zoomed out) and 23 (fully zoomed in). |
language | none | string (ISO code) | This display language for map. Can be any 2-letter ISO Code, or local to use the device's specified language. Defaults to en-US if none is provided. |
Styles#
Radar provides several out-of-the box map styles:
| Style | Preview | Description |
|---|---|---|
radar-default-v1 |  | Radar's default map style, showcasing detailed street-level information about roads and nearby places. A general purpose map suitable for most use cases. |
radar-light-v1 | 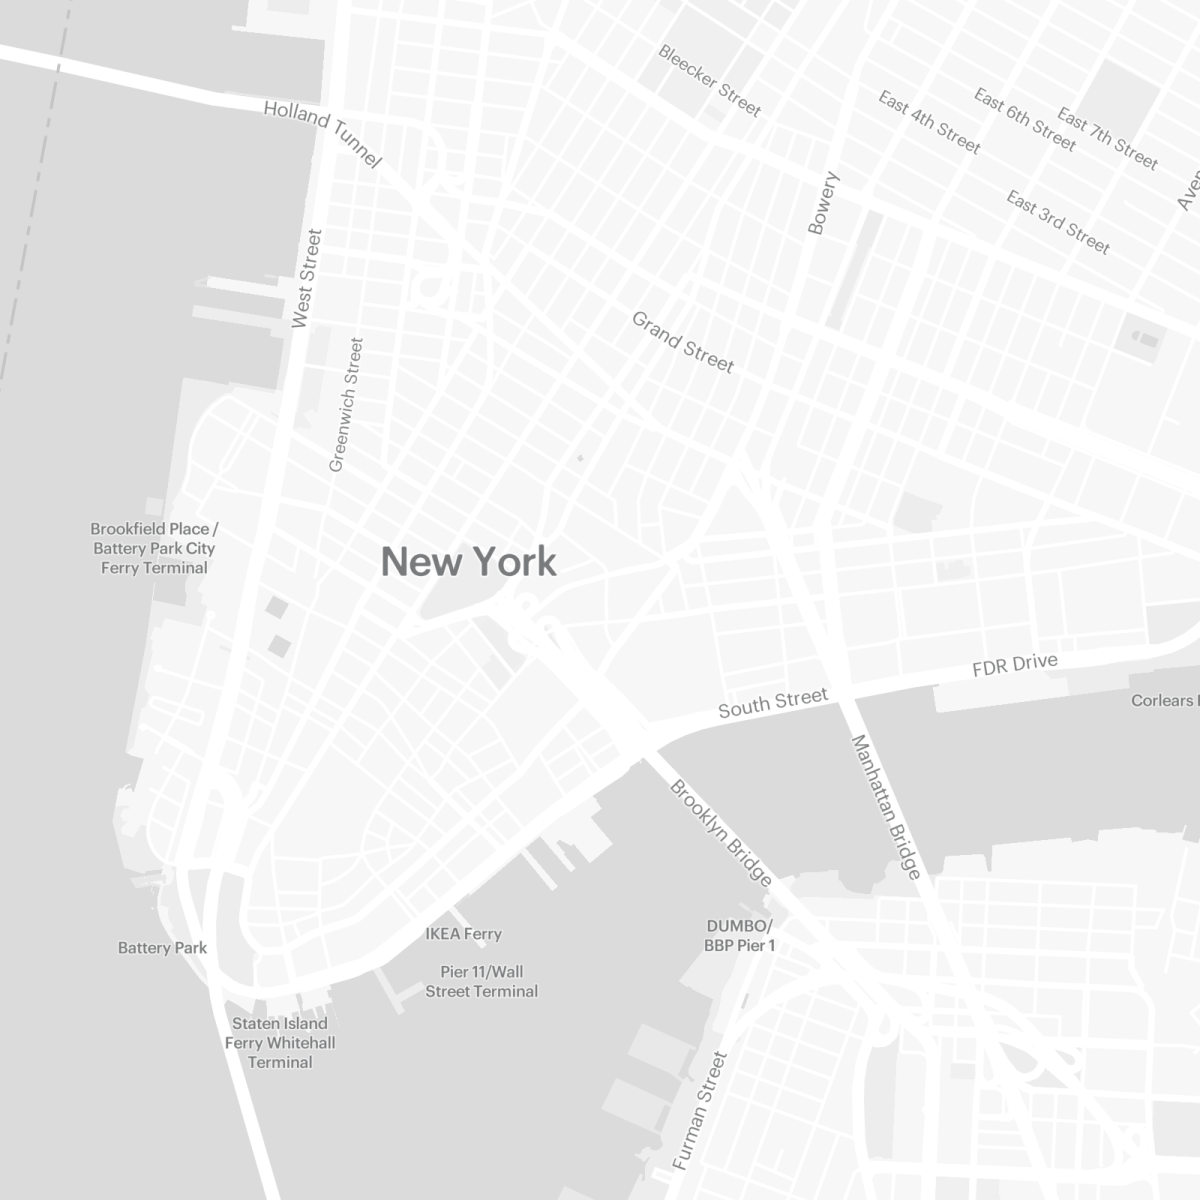 | A light monochrome map style, useful for highlighting your own information or visualizations. |
radar-dark-v1 | 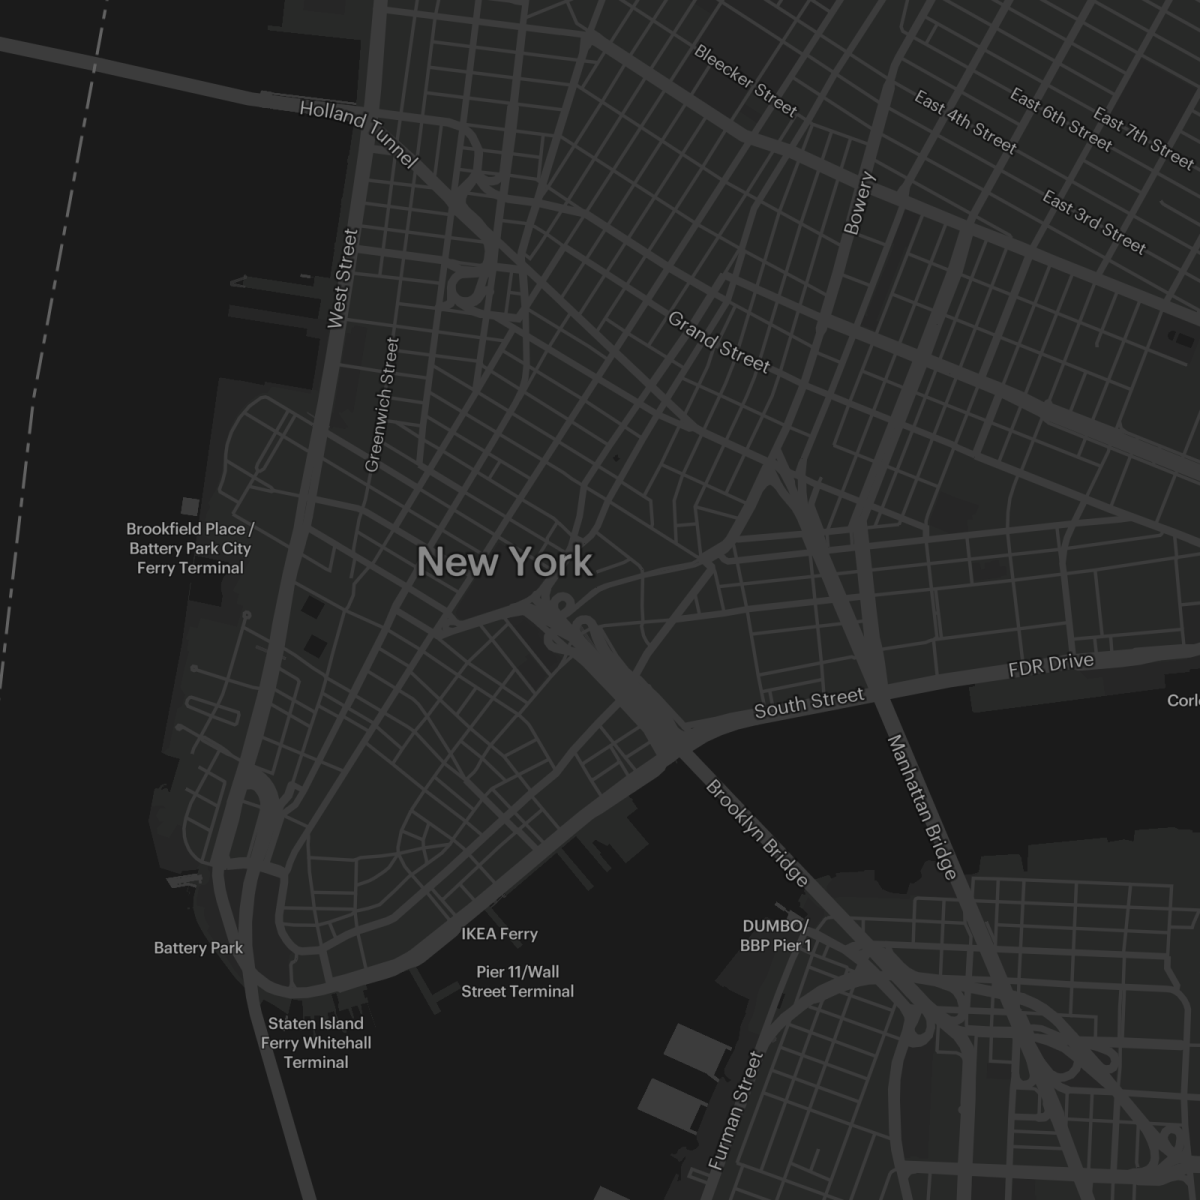 | A dark monochrome map style, useful for highlighting your own information or visualizations in dark mode. |
Quickstart#
First, sign up for Radar and get an API key.
Then, get started with the sample code below.
Happy mapping!
JavaScript#
To create a simple web page with a map:
<!DOCTYPE html><html>  <head>    <meta charset="utf-8" />    <meta name="viewport" content="initial-scale=1,maximum-scale=1,user-scalable=no" />    <link href="https://js.radar.com/v4.3.2/radar.css" rel="stylesheet">    <script src="https://js.radar.com/v4.3.2/radar.min.js"></script>  </head>
  <body>    <div id="map" style="width: 100%; height: 500px;" />
    <script type="text/javascript">      Radar.initialize('prj_live_pk_...');
      // create a map      const map = Radar.ui.map({        container: 'map',        style: 'radar-default-v1',        center: [-73.9911, 40.7342], // NYC        zoom: 11      });
// add a marker to the map const marker = Radar.ui.marker({ text: 'Radar HQ' }) .setLngLat([-73.9910078, 40.7342465]) .addTo(map); </script> </body></html>React#
To create a React component with a map:
npm install --save radar-sdk-js maplibre-glThe SDK has a dependency on maplibre-gl.
import React from 'react';import Radar from 'radar-sdk-js';
import 'radar-sdk-js/dist/radar.css';
class RadarMap extends React.Component {  componentDidMount() {    Radar.initialize('prj_live_pk_...');
    // create a map    const map = Radar.ui.map({      container: 'map',      style: 'radar-default-v1',      center: [-73.9911, 40.7342], // NYC      zoom: 14,    });
    // add a marker to the map    Radar.ui.marker({ text: 'Radar HQ' })      .setLngLat([-73.9910078, 40.7342465])      .addTo(map);  }
  render() {    return (      <div id="map-container" style={{ width:' 100%', height: '100vh', position: 'absolute' }}>        <div id="map" style={{ height: '100%', position: 'absolute', width: '100%' }} />      </div>    );  }};
export default RadarMap;Vue#
To create a Vue component with a map:
npm install --save radar-sdk-js maplibre-glThe SDK has a dependency on maplibre-gl.
<template>  <div id="map-container">    <div id="map" ref="mapRef" />  </div></template>
<script>import Radar from 'radar-sdk-js';import { shallowRef, onMounted, onUnmounted, markRaw } from 'vue';
export default {  name: 'RadarMap',  setup () {    const mapRef = shallowRef(null);    const map = shallowRef(null);
    onMounted(() => {      Radar.initialize('prj_live_pk_...');
      // create a map      map.value = markRaw(Radar.ui.map({        container: mapRef.value,        style: 'radar-default-v1',        center: [-73.9911, 40.7342], // NYC        zoom: 11      }));
      // add a marker to the map      Radar.ui.Marker({ color: '#007aff' })        .setLngLat([-73.9911, 40.7342]) // Radar HQ        .addTo(map.value);    }),
    onUnmounted(() => {      map.value?.remove();    })
    return {      map, mapRef    };  }};</script>
<style>@import 'radar-sdk-js/dist/radar.css';
body {  margin: 0;  padding: 0;}
#map-container {  height: 100%;  position: absolute;  width: 100%;}
#map { height: 100%; position: absolute; width: 100%;}</style>React Native#
To create a React Native component with a map:
npm install --save react-native-radar @maplibre/maplibre-react-nativeThe SDK has a dependency on maplibre-react-native.
Next, complete any required platform-specific installation steps.
Finally, initialize the Radar SDK and add a <Map> component:
import { View } from 'react-native';import Radar, { Map } from 'react-native-radar';import MapLibreGL from '@maplibre/maplibre-react-native';
// NOTE: MapLibre requires setting their deprecated access token to nullMapLibreGL.setAccessToken(null);
Radar.initialize('prj_live_pk_...');
export const App = () => ( <View style={{ width: '100%', height: '95%' }}> <Map /> </View>);Optionally, add assets for a marker. You can download assets here.
To add a marker to the map and control the camera:
  const [cameraConfig, setCameraConfig] = useState({    triggerKey: Date.now(),    centerCoordinate: [-73.9911, 40.7342],    animationMode: 'flyTo',    animationDuration: 600,    zoomLevel: 12,  });
  const onRegionDidChange = (event) => {    // do something on region change  }
  const onSelect = (address) => {    // do something with selected address  }
const pointsCollection = { type: 'FeatureCollection', features: [ { type: 'Feature', properties: { _id: '123', }, geometry: { type: 'Point', coordinates: [-73.9911, 40.7342] } } ] }; const onPress = (event) => { // do something on press } return ( <View style={{ width: '100%', marginTop: '10%', height: '90%' }}> <Map mapOptions={{ onRegionDidChange, }}> <MapLibreGL.Camera {...cameraConfig} /> <MapLibreGL.Images images={{ icon: require('./assets/marker.png'), }} /> <MapLibreGL.ShapeSource id="points" shape={pointsCollection} onPress={onPress} > <MapLibreGL.SymbolLayer id="symbol" style={{ iconImage: 'icon', iconSize: [ 'interpolate', ['linear'], ['zoom'], 0, 0.2, // adjust the icon size for zoom level 0 12, 0.4, // adjust the icon size for zoom level 12 22, 0.8, // adjust the icon size for zoom level 22 ], iconAllowOverlap: true, }} /> </MapLibreGL.ShapeSource> </Map> </View> );iOS#
To create a map on iOS, add MapLibre Native to your Xcode project.
Then, add assets for the Radar logo and optionally for a marker. You can download assets here.
Finally, add a MapView to a ViewController with a Radar style URL that includes your publishable key:
import SwiftUIimport MapLibre
struct MapView: UIViewRepresentable {        func makeCoordinator() -> MapView.Coordinator {        Coordinator(self)    }        func makeUIView(context: Context) -> MLNMapView {        // create a map
        let style = "radar-default-v1"        let publishableKey = "prj_live_pk..."        let styleURL = URL(string: "https://api.radar.io/maps/styles/\(style)?publishableKey=\(publishableKey)")
        let mapView = MLNMapView(frame: .zero, styleURL: styleURL)        mapView.autoresizingMask = [.flexibleWidth, .flexibleHeight]        mapView.logoView.isHidden = true
        mapView.setCenter(          CLLocationCoordinate2D(latitude: 40.7342, longitude: -73.9911),          zoomLevel: 11,          animated: false        )                // add the Radar logo
        let logoImageView = UIImageView(image: UIImage(named: "radar-logo"))        logoImageView.translatesAutoresizingMaskIntoConstraints = false        mapView.addSubview(logoImageView)
        NSLayoutConstraint.activate([            logoImageView.bottomAnchor.constraint(equalTo: mapView.safeAreaLayoutGuide.bottomAnchor, constant: -10),            logoImageView.leadingAnchor.constraint(equalTo: mapView.safeAreaLayoutGuide.leadingAnchor, constant: 10),            logoImageView.widthAnchor.constraint(equalToConstant: 74),            logoImageView.heightAnchor.constraint(equalToConstant: 26)        ])
        mapView.delegate = context.coordinator
        return mapView    }        func updateUIView(_ uiView: MLNMapView, context: Context) {
    }        // add a marker on map load
    class Coordinator: NSObject, MLNMapViewDelegate {        var control: MapView
        init(_ control: MapView) {            self.control = control        }
        func mapView(_ mapView: MLNMapView, didFinishLoading style: MLNStyle) {            addMarker(style: style, coordinate: CLLocationCoordinate2D(latitude: 40.7342, longitude: -73.9911))        }
        func addMarker(style: MLNStyle, coordinate: CLLocationCoordinate2D) {            let point = MLNPointAnnotation()            point.coordinate = coordinate
            let shapeSource = MLNShapeSource(identifier: "marker-source", shape: point, options: nil)
            let shapeLayer = MLNSymbolStyleLayer(identifier: "marker-style", source: shapeSource)
            if let image = UIImage(named: "default-marker") {                style.setImage(image, forName: "marker")            }
            shapeLayer.iconImageName = NSExpression(forConstantValue: "marker")
style.addSource(shapeSource) style.addLayer(shapeLayer) } }}Android#
To create a map on Android, add MapLibre Native to the dependencies section of your app's build.gradle file. Optionally, add the MapLibre Annotation Plugin to add a marker to the map:
dependencies { implementation 'org.maplibre.gl:android-sdk:11.0.0' implementation 'org.maplibre.gl:android-plugin-annotation-v9:3.0.0' // optional import for adding a marker}Import assets for the Radar logo and optionally for a marker. You can download assets here.
Then, add a MapView with the Radar logo to your layout:
<?xml version="1.0" encoding="utf-8"?><androidx.constraintlayout.widget.ConstraintLayout xmlns:android="http://schemas.android.com/apk/res/android"    xmlns:app="http://schemas.android.com/apk/res-auto"    xmlns:tools="http://schemas.android.com/tools"    android:layout_width="match_parent"    android:layout_height="match_parent"    tools:context=".MainActivity">
    <org.maplibre.android.maps.MapView        android:id="@+id/mapView"        android:layout_width="match_parent"        android:layout_height="match_parent"        />
    <ImageView        android:id="@+id/overlayImageView"        android:layout_width="wrap_content"        android:layout_height="wrap_content"        android:src="@drawable/radar_logo"        app:layout_constraintBottom_toBottomOf="@id/mapView"        app:layout_constraintStart_toStartOf="@id/mapView"        android:layout_marginBottom="10dp"        android:layout_marginStart="10dp" />
</androidx.constraintlayout.widget.ConstraintLayout>Finally, add a MapView in your Activity with a Radar style URL that includes your publishable key:
import android.os.Bundleimport android.view.Gravityimport android.view.LayoutInflaterimport androidx.appcompat.app.AppCompatActivityimport androidx.core.content.res.ResourcesCompatimport androidx.core.graphics.drawable.toBitmap
import org.maplibre.android.MapLibreimport org.maplibre.android.camera.CameraPositionimport org.maplibre.android.geometry.LatLngimport org.maplibre.android.maps.MapLibreMapimport org.maplibre.android.maps.MapView
// optional import for adding a markerimport org.maplibre.android.plugins.annotation.SymbolManagerimport org.maplibre.android.plugins.annotation.SymbolOptions
const val MARKER_NAME = "radar-marker"
class MainActivity : AppCompatActivity() {
    private lateinit var mapView: MapView    private lateinit var mapLibreMap: MapLibreMap
    override fun onCreate(savedInstanceState: Bundle?) {        super.onCreate(savedInstanceState)
        // create a map        val style = "radar-default-v1"        val publishableKey = "prj_live_pk_..."        val styleURL = "https://api.radar.io/maps/styles/$style?publishableKey=$publishableKey"
        MapLibre.getInstance(this)
        val inflater = LayoutInflater.from(this)        val rootView = inflater.inflate(R.layout.activity_main, null)        setContentView(rootView)
        mapView = rootView.findViewById(R.id.mapView)
        mapView.getMapAsync { map ->            mapLibreMap = map
            // add the Radar logo            map.uiSettings.isLogoEnabled = false
            map.uiSettings.attributionGravity = Gravity.RIGHT + Gravity.BOTTOM            map.uiSettings.setAttributionMargins(0, 0, 24, 24)
            map.setStyle(styleURL) {style ->
                // optionally add a marker to the map on style load                val infoIconDrawable = ResourcesCompat.getDrawable(                    this.resources,                    // use imported marker resource                    R.drawable.default_marker,                    null                )!!
                // create marker icon bmp                val bitmapMarker = infoIconDrawable.toBitmap()                style.addImage(MARKER_NAME, bitmapMarker)
                val symbolManager = SymbolManager(mapView, map, style)
                // disable symbol collisions to draw over map style symbols like POIs and labels                symbolManager.iconAllowOverlap = true                symbolManager.iconIgnorePlacement = true
                val symbol = symbolManager.create(                    SymbolOptions()                        .withLatLng(LatLng(40.7342,-73.9911))                        .withIconImage(MARKER_NAME)                        .withIconSize(1.25f)                        .withIconAnchor("bottom")                )                symbolManager.update(symbol)
                // set camera position to symbol latlng                map.cameraPosition = CameraPosition.Builder()                    .target(symbol.latLng)                    .zoom(11.0)                    .build()            }        }    }
    override fun onStart() {        super.onStart()        mapView.onStart()    }
    override fun onResume() {        super.onResume()        mapView.onResume()    }
    override fun onPause() {        super.onPause()        mapView.onPause()    }
    override fun onStop() {        super.onStop()        mapView.onStop()    }
    override fun onLowMemory() {        super.onLowMemory()        mapView.onLowMemory()    }
    override fun onDestroy() {        super.onDestroy()        mapView.onDestroy()    }
override fun onSaveInstanceState(outState: Bundle) { super.onSaveInstanceState(outState) mapView.onSaveInstanceState(outState) }}Examples#
Fit map to markers#
Use the map.fitToMarkers() function to center and zoom the map to encompass all the markers on the map.
It accepts FlyToOptions as an optional argument.
In the example below, clicking the map will place a new marker, and refit the map so all markers are visible. Clicking a marker will remove it.
<!DOCTYPE html><html>  <head>    <meta charset="utf-8" />    <meta name="viewport" content="initial-scale=1,maximum-scale=1,user-scalable=no" />    <link href="https://js.radar.com/v4.3.2/radar.css" rel="stylesheet">    <script src="https://js.radar.com/v4.3.2/radar.min.js"></script>  </head>
  <body>    <div id="map" style="width: 100%; height: 400px;" />
    <script type="text/javascript">      Radar.initialize('prj_live_pk_...');
      // create map      const map = Radar.ui.map({        container: 'map',      });
      // add marker on map click      map.on('click', (e) => {        const { lng, lat } = e.lngLat;
        // create marker from click location        const marker = Radar.ui.marker()          .setLngLat([lng, lat])          .addTo(map);
        // fit map to markers        map.fitToMarkers({ maxZoom: 14, padding: 80 });
// add listener to remove marker on click marker.on('click', (e) => { marker.remove(); map.fitToMarkers({ maxZoom: 14, padding: 80 }); // refit after marker removed }); }); </script> </body></html>Add a custom icon#
Add a Marker with a custom image to the map by specifying the image URL.
<!DOCTYPE html><html>  <head>    <meta charset="utf-8" />    <meta name="viewport" content="initial-scale=1,maximum-scale=1,user-scalable=no" />    <link href="https://js.radar.com/v4.3.2/radar.css" rel="stylesheet">    <script src="https://js.radar.com/v4.3.2/radar.min.js"></script>  </head>
  <body>    <div id="map" style="width: 100%; height: 400px;" />
    <script type="text/javascript">      Radar.initialize('prj_live_pk_...');
      // create map      const map = Radar.ui.map({        container: 'map',      });
      map.on('load', () => {        const { lng, lat } = map.getCenter();
// add marker to map at map center Radar.ui.marker({ url: 'https://radar.com/static/image/logo.png', width: '48px', height: '48px', popup: { text: 'Radar HQ', }, }) .setLngLat([lng, lat]) .addTo(map); }); </script> </body></html>Display a custom popup#
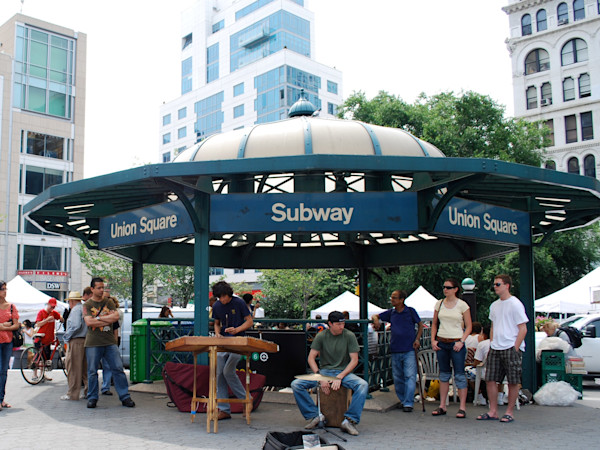
Display a popup with customized HTML.
Union Square
<!DOCTYPE html><html>  <head>    <meta charset="utf-8" />    <meta name="viewport" content="initial-scale=1,maximum-scale=1,user-scalable=no" />    <link href="https://js.radar.com/v4.3.1/radar.css" rel="stylesheet">    <script src="https://js.radar.com/v4.3.1/radar.min.js"></script>  </head>
  <body>    <div id="map" style="width: 100%; height: 400px;" />
    <div id="custom-popup" style="visibility: hidden; text-align: center;">      <h3>Union Square</h3>      <img width="100" src="https://images.ctfassets.net/f2vbu16fzuly/7BUSW7MAtT2abUQY8U3Ri6/11fb8b92fd24c326bfd5da3064d67666/union_square.jpg?w=600" />    </div>
    <script type="text/javascript">      Radar.initialize('prj_live_pk_');
      // create map      const map = Radar.ui.map({        container: 'map',        center: [-73.990550, 40.735225],        zoom: 16,      });
      map.on('load', () => {
        // Create a marker with a custom popup using HTML        Radar.ui.marker({          popup: {            html: `              <div style="text-align: center;">                <h3>The Roosevelt Building</h3>                <img width="100" src="https://images.ctfassets.net/f2vbu16fzuly/5VZ6BEW5Ju6kL4OeooR2YG/4e694ad24b8d57c6b9958de79976d89e/Screenshot_2024-07-15_at_9.43.45_AM.png?w=400" />              </div>            `,          },        })        .setLngLat([-73.9910078, 40.7342465])        .addTo(map);
        // Create a marker with a custom popup using a DOM element        const element = document.getElementById('custom-popup').cloneNode(true /* deep */);        element.style.visibility = 'visible';        element.id = 'custom-popup-1';
Radar.ui.marker({ popup: { element, }, }) .setLngLat([-73.990389, 40.735862]) .addTo(map); }); </script> </body></html>Change map language#
The map display language can be changed by setting the language option to the ISO language code (en), or the browser's current setting from navigator.language.
You can also set language: "local" to use the device language by default.
<!DOCTYPE html><html>  <head>    <meta charset="utf-8" />    <meta name="viewport" content="initial-scale=1,maximum-scale=1,user-scalable=no" />    <link href="https://js.radar.com/v4.3.2/radar.css" rel="stylesheet">    <script src="https://js.radar.com/v4.3.2/radar.min.js"></script>  </head>
  <body>    <div id="map" style="width: 100%; height: 400px;" />
    <script type="text/javascript">      Radar.initialize('prj_live_pk_...');
      // create map      const map = Radar.ui.map({        container: 'map',        language: 'local',      });
</script> </body></html>Coverage#
Radar map data comes from OpenStreetMap.
The following table describes data coverage for maps, by country, for consumer use cases (e.g., store locators) and logistics use cases (e.g., ride sharing, delivery).
Legend#
| Icon | Description |
|---|---|
| ⬤ | Great data quality and availability |
| ◐ | Good data quality and availability |
| ◯ | Approximate data quality and availability |
Coverage#
| Maps | |
|---|---|
| 🇺🇸 US (consumer) | ⬤ |
| 🇺🇸 US (logistics) | ⬤ |
| 🇨🇦 CA (consumer) | ⬤ |
| 🇨🇦 CA (logistics) | ⬤ |
| 🇬🇧 UK (consumer) | ⬤ |
| 🇬🇧 UK (logistics) | ⬤ |
| 🌎 Other (consumer) | ⬤ |
| 🌎 Other (logistics) | ◐ |
Support#
Have questions? We're here to help! Contact us at radar.com/support.